Refashioned felt vest: Making my own buttons
- No Comments
I went to buy buttons yesterday for the vest and they were too expensive. I want 10 buttons, and the cheapest, most boring little buttons there cost 85 cents each (the ones I wanted were €1.45 each, but I’m not spending €14.50 on buttons when the rest of the vest cost nothing!).
I decided to cover my own buttons, and when I say this, I mean cover buttons lying around at home (would you believe it, the covered-button kits at the shop were also expensive). So here’s how I did it:
(These steps not pictured)
a. Pick buttons the size and shape you want. I only had 8 matching buttons, plus 2 different ones in the same size. The difference doesn’t stand out in the final product. Measure across widest point of the button. (1.5 cm in this case).
b. Double the measurement (3 cm in this case, but I decided on 2.5 cm because wool stretches).
c. Search your house for something round with this diameter (a spool of thread for me).
d. Trace it onto cardboard and cut it out. This is your pattern.
(Here come the pictured steps)
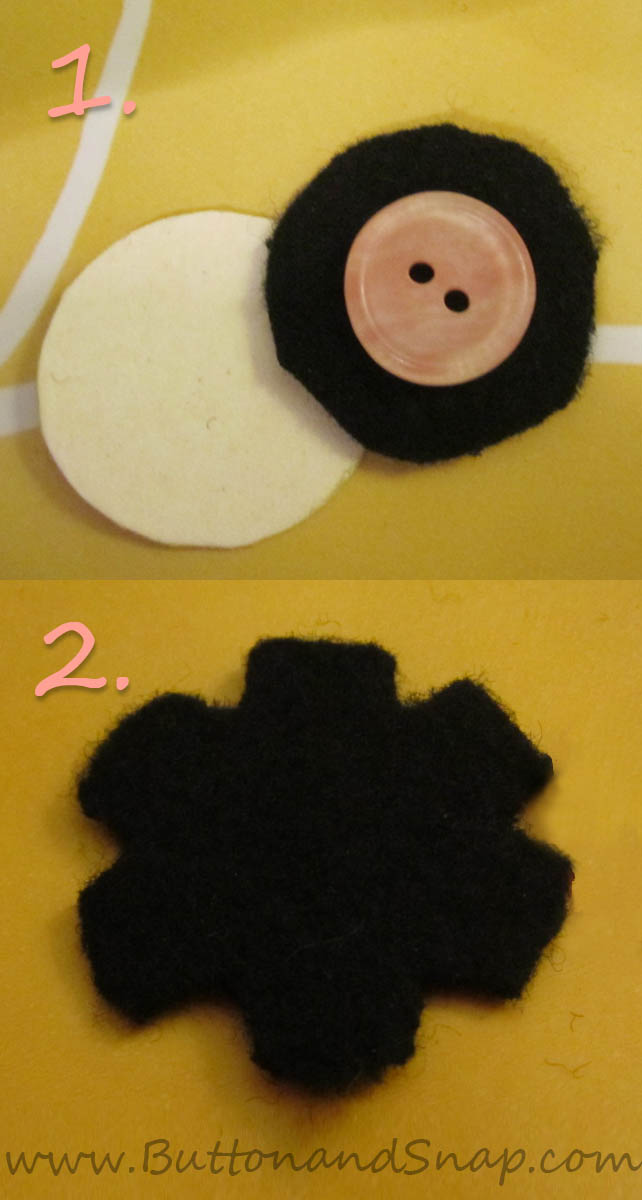
1. Here is the button, the pattern, and the fabric cut out for you to admire
2. If your fabric is more thick and less prone to unravelling, cut notches to reduce bulk on the back of the button. This is unnecessary for thin fabric, and probably not a good idea it the fabric unravels easily or is loosely woven.
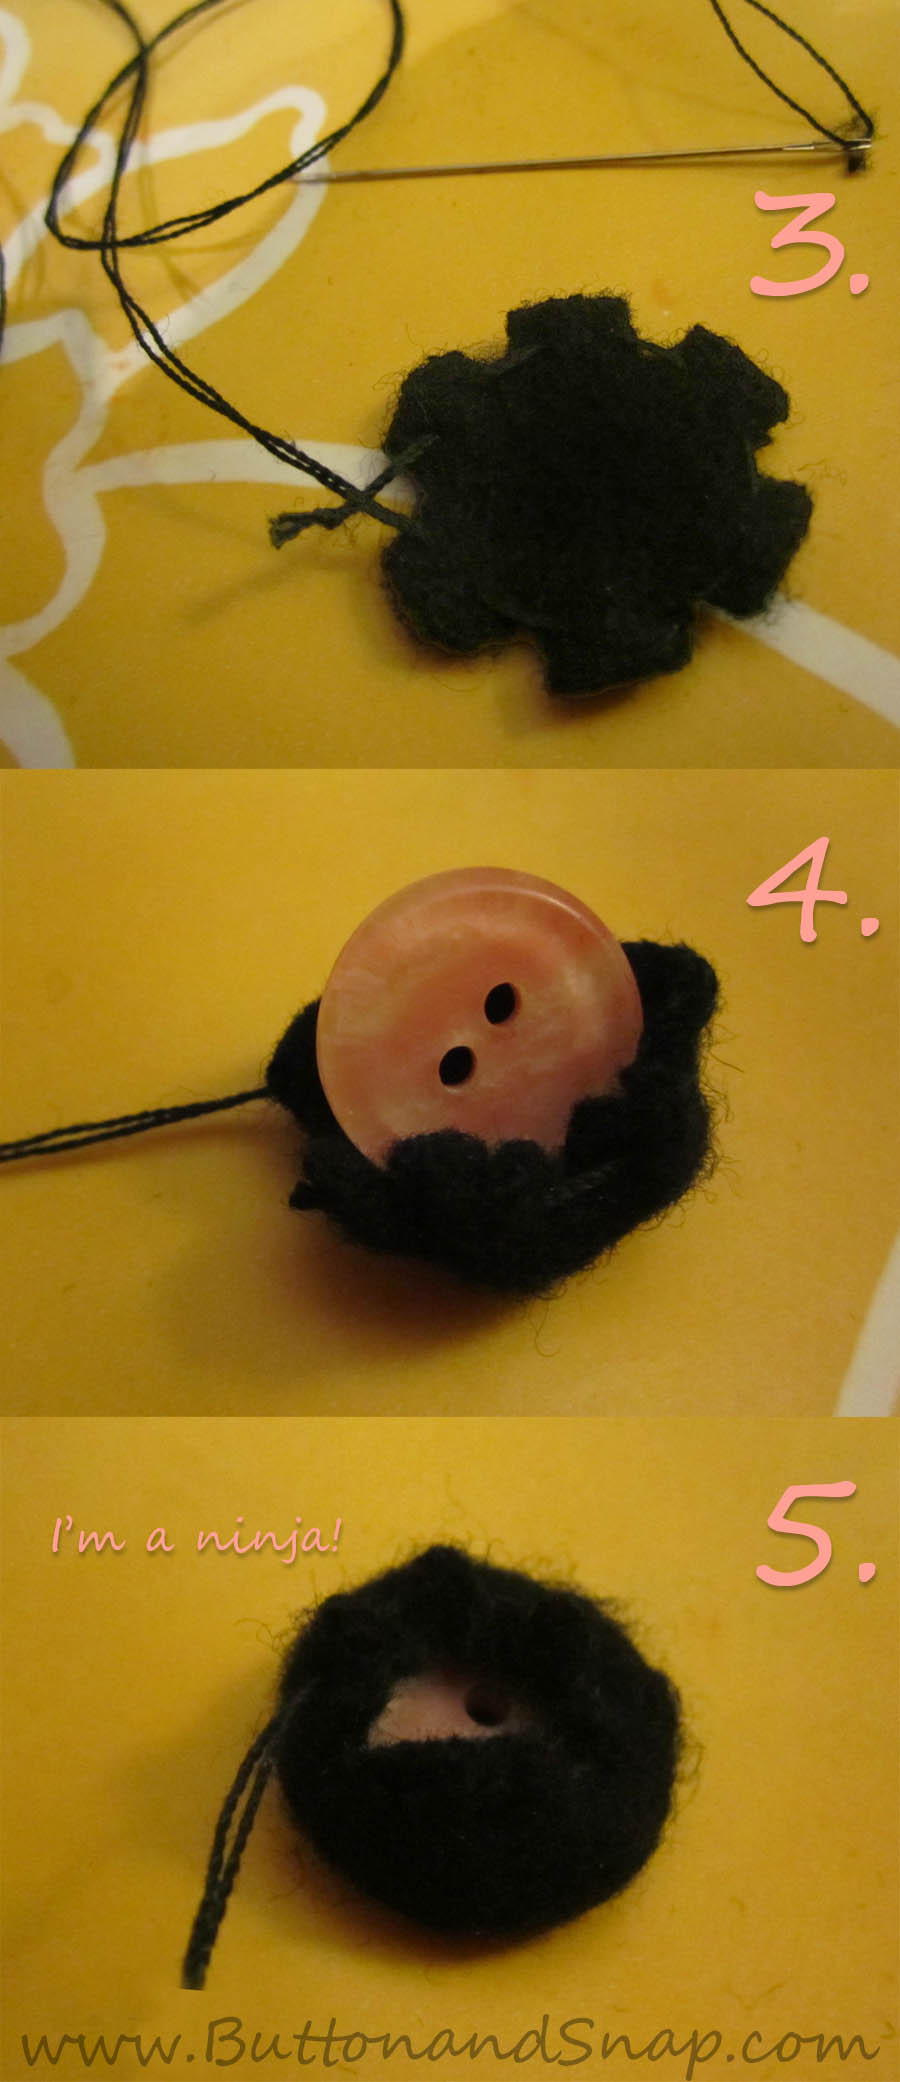
 3. Run a running stitch around the edge. Use thick thread or quadruple it up; it’ll be put under a lot of strain. By the way, I tried this first with a machine, and it didn’t work out. Doing it by hand was faster and easier.
4. Start to gather the cover, then insert the button. (The smooth back side of the button will become the front side of the covered button).
5. Pull tight!
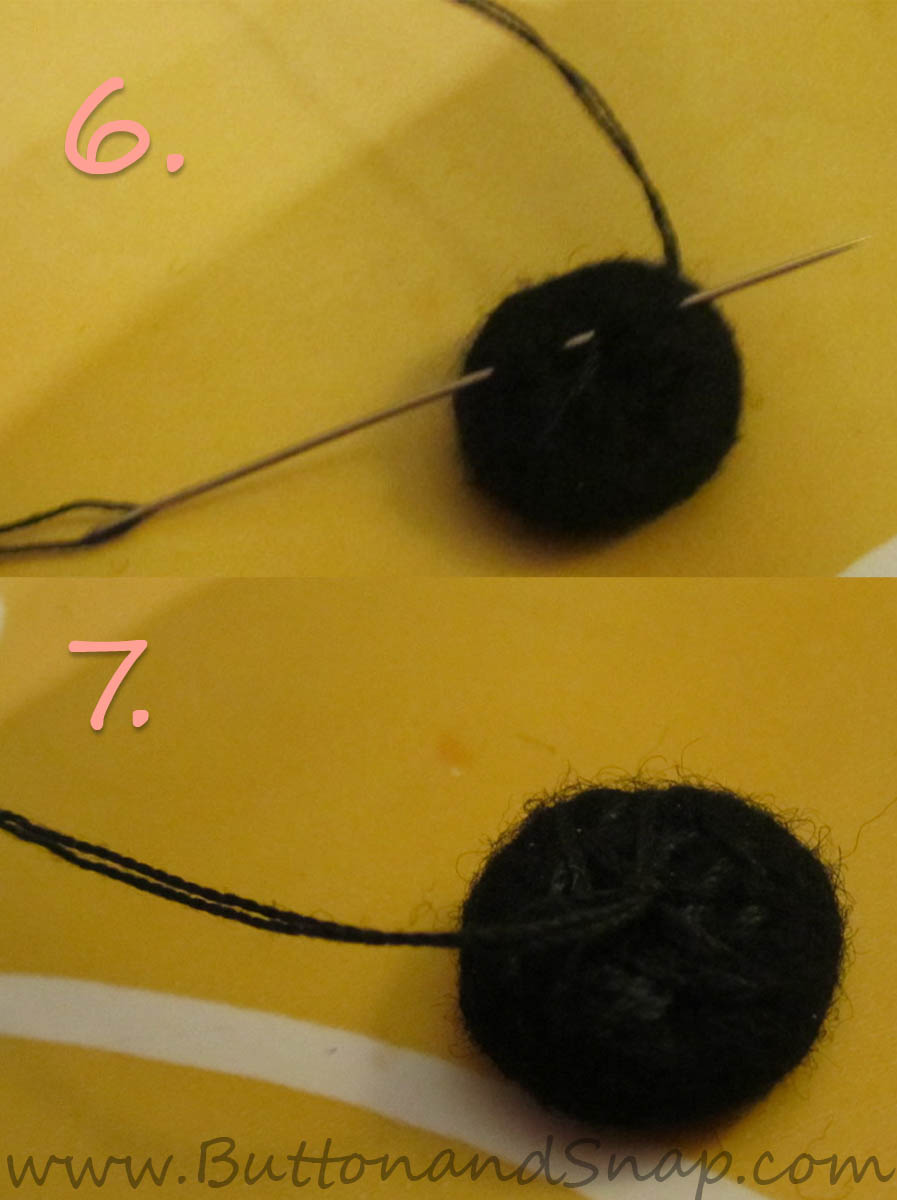
6. Sew criss-crossing stitches across the back and keep pulling tight until everything is taut and smooth around the front and sides.
Voilaaa!!! Lovely buttons! They’re not all quite as smooth as I want them, but I don’t think it will show up on the vest because, y’know, black on black. I’m going to try this again and see if I can get it better. I’ll keep you posted!


Leave a Reply