Me Made Midweek… or Monday. whatever.
- No Comments
 Me Made Midweek #2
Sorry I dropped the ball last Wednesday. I hope you can live with a belated Me Made Midweek!
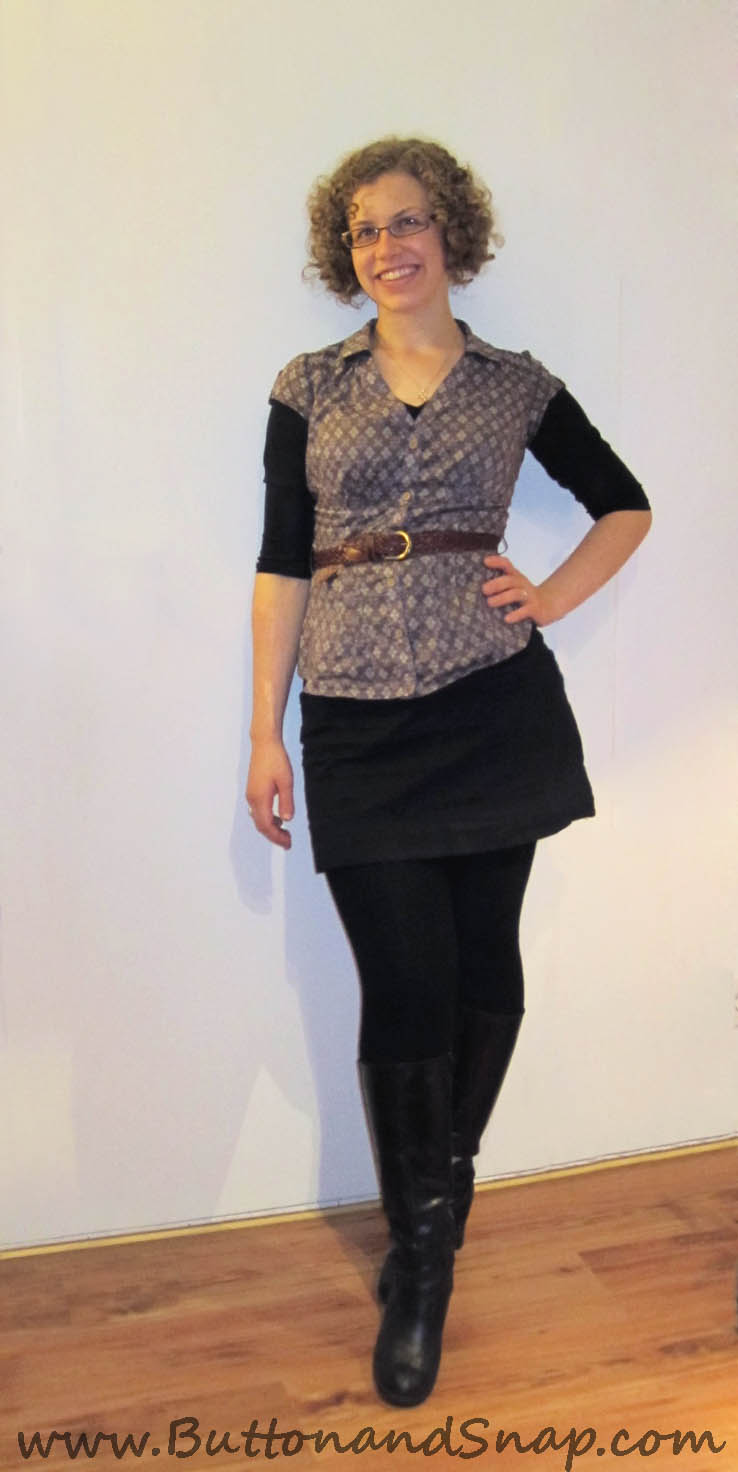
I picked up this blouse and skirt a few months ago at a thrift shop. I liked the fabric of the blouse, but almost nothing else about it, so I completely refashioned it. The skirt was fine, except that it wouldn’t fit over my hips, so I made it larger. Being able to sew makes thrift shop success so much more easily attainable.
Turning a mehhh blouse into a nice one
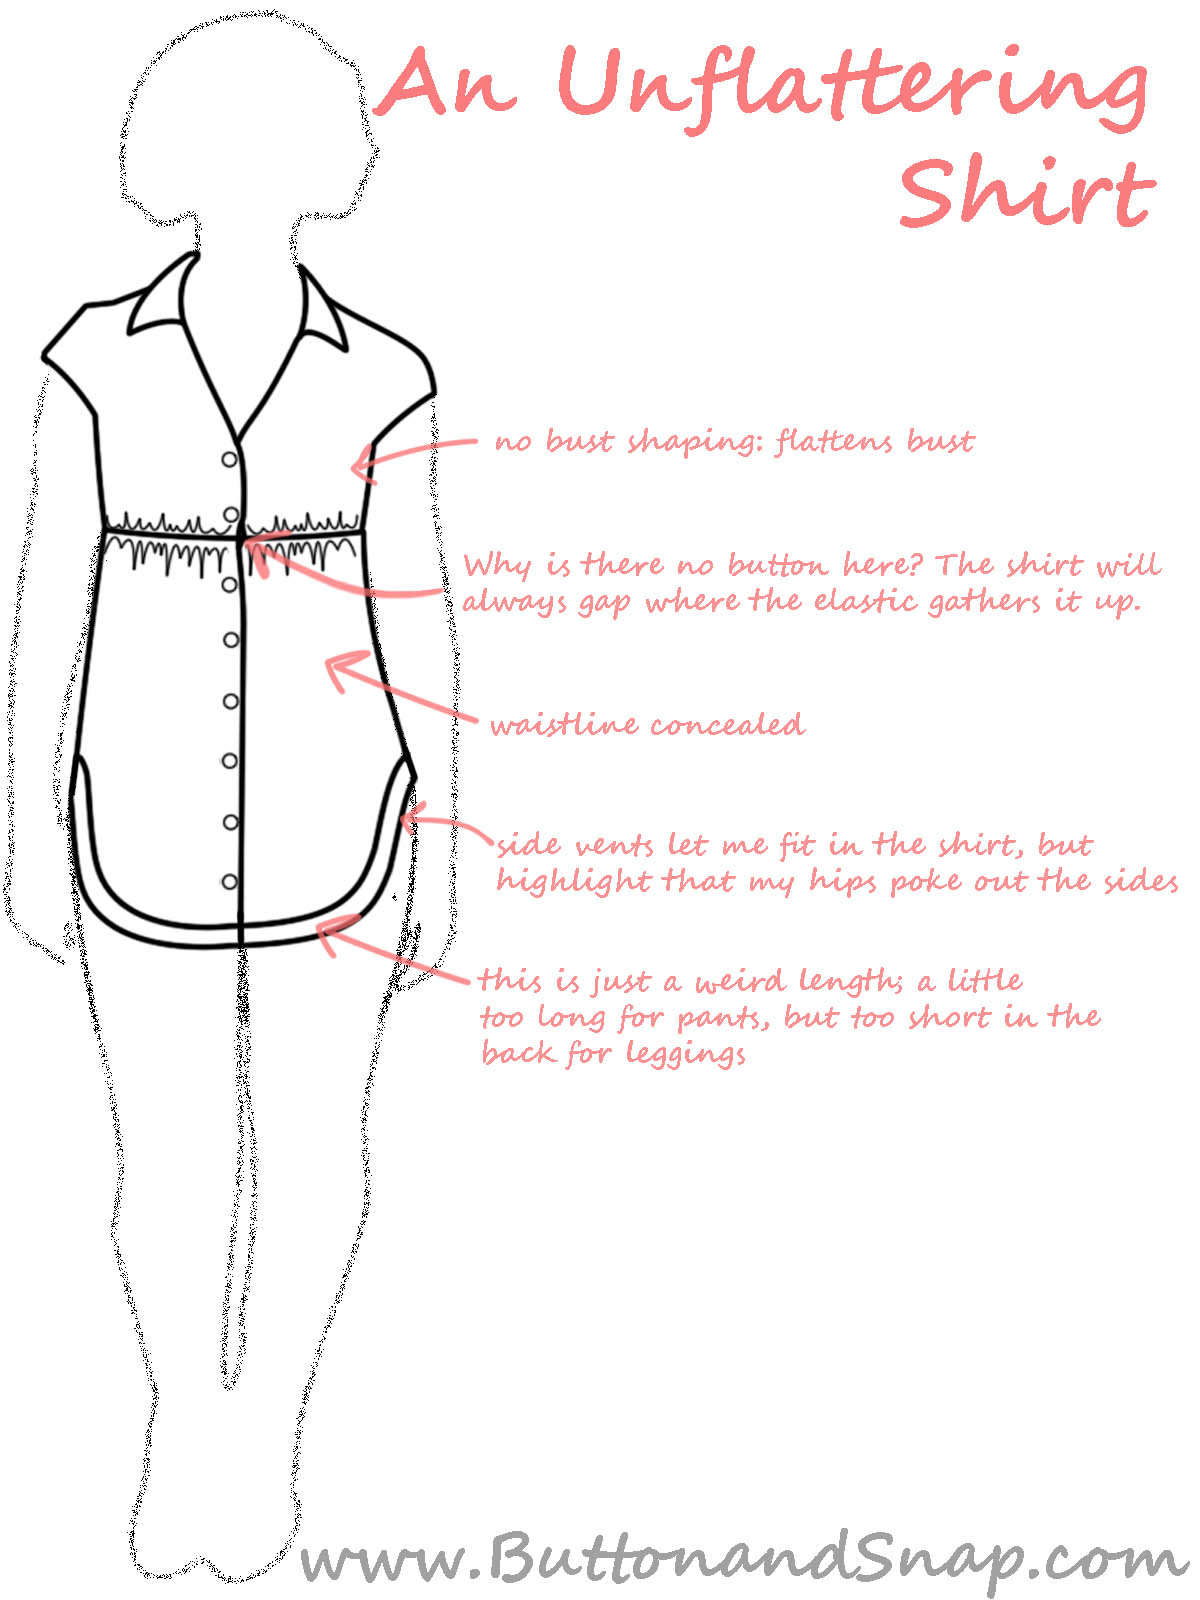
I liked the fabric and the pintucks at the shoulders of this blouse when I bought it, but that was about all that I liked. Since I didn’t take a “before” photo, I’ve made you… a diagram(!!!!) to show you everything wrong with the old blouse:
Look at that diagram. It’s the best one yet. It more than makes up for the lateness of this post and poor photo quality.
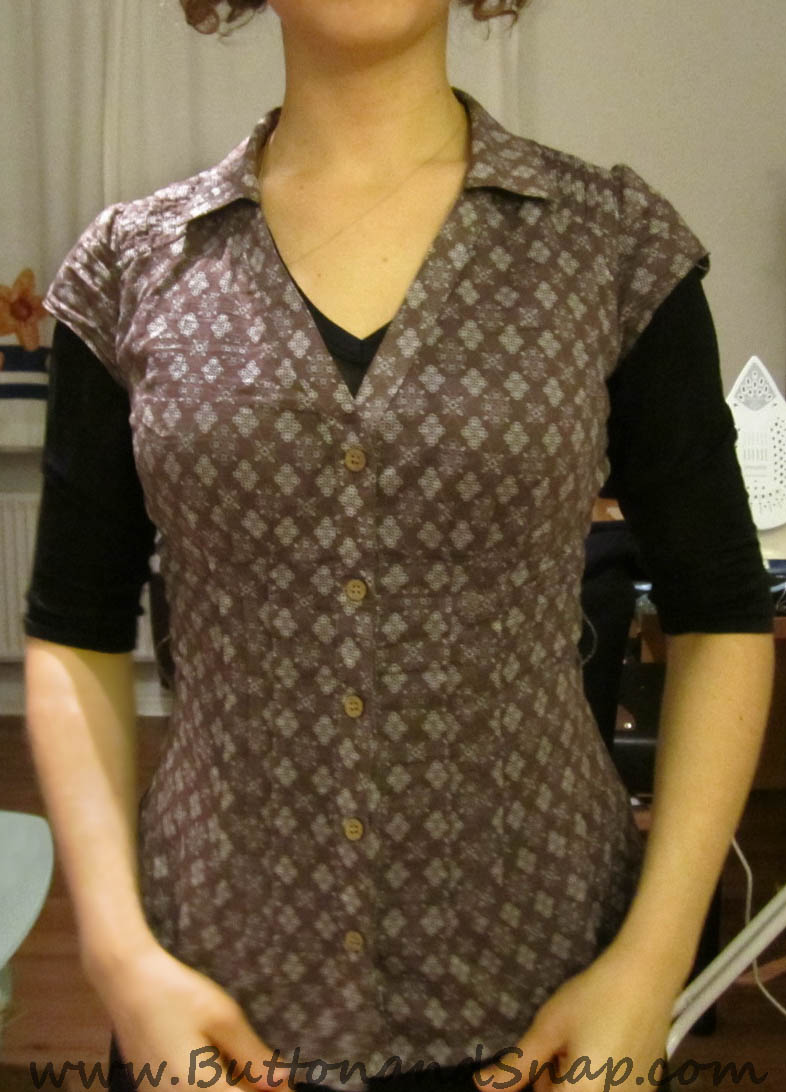
I shortened the hem, removed the elastic under the bust, and added three pintucks to each side in order to take in the waist and emulate the pintucks at the shoulders. To improve the fit, I removed the sleeves and added a dart from the bust into the armscye. Since I had noticed that the sleeves pressed against the front of my arms when I put my arms in front of me, I changed the angle of the sleeves back in, tilting them so that the arm opening at the bottom was angled slightly forward. Hopefully that makes sense.
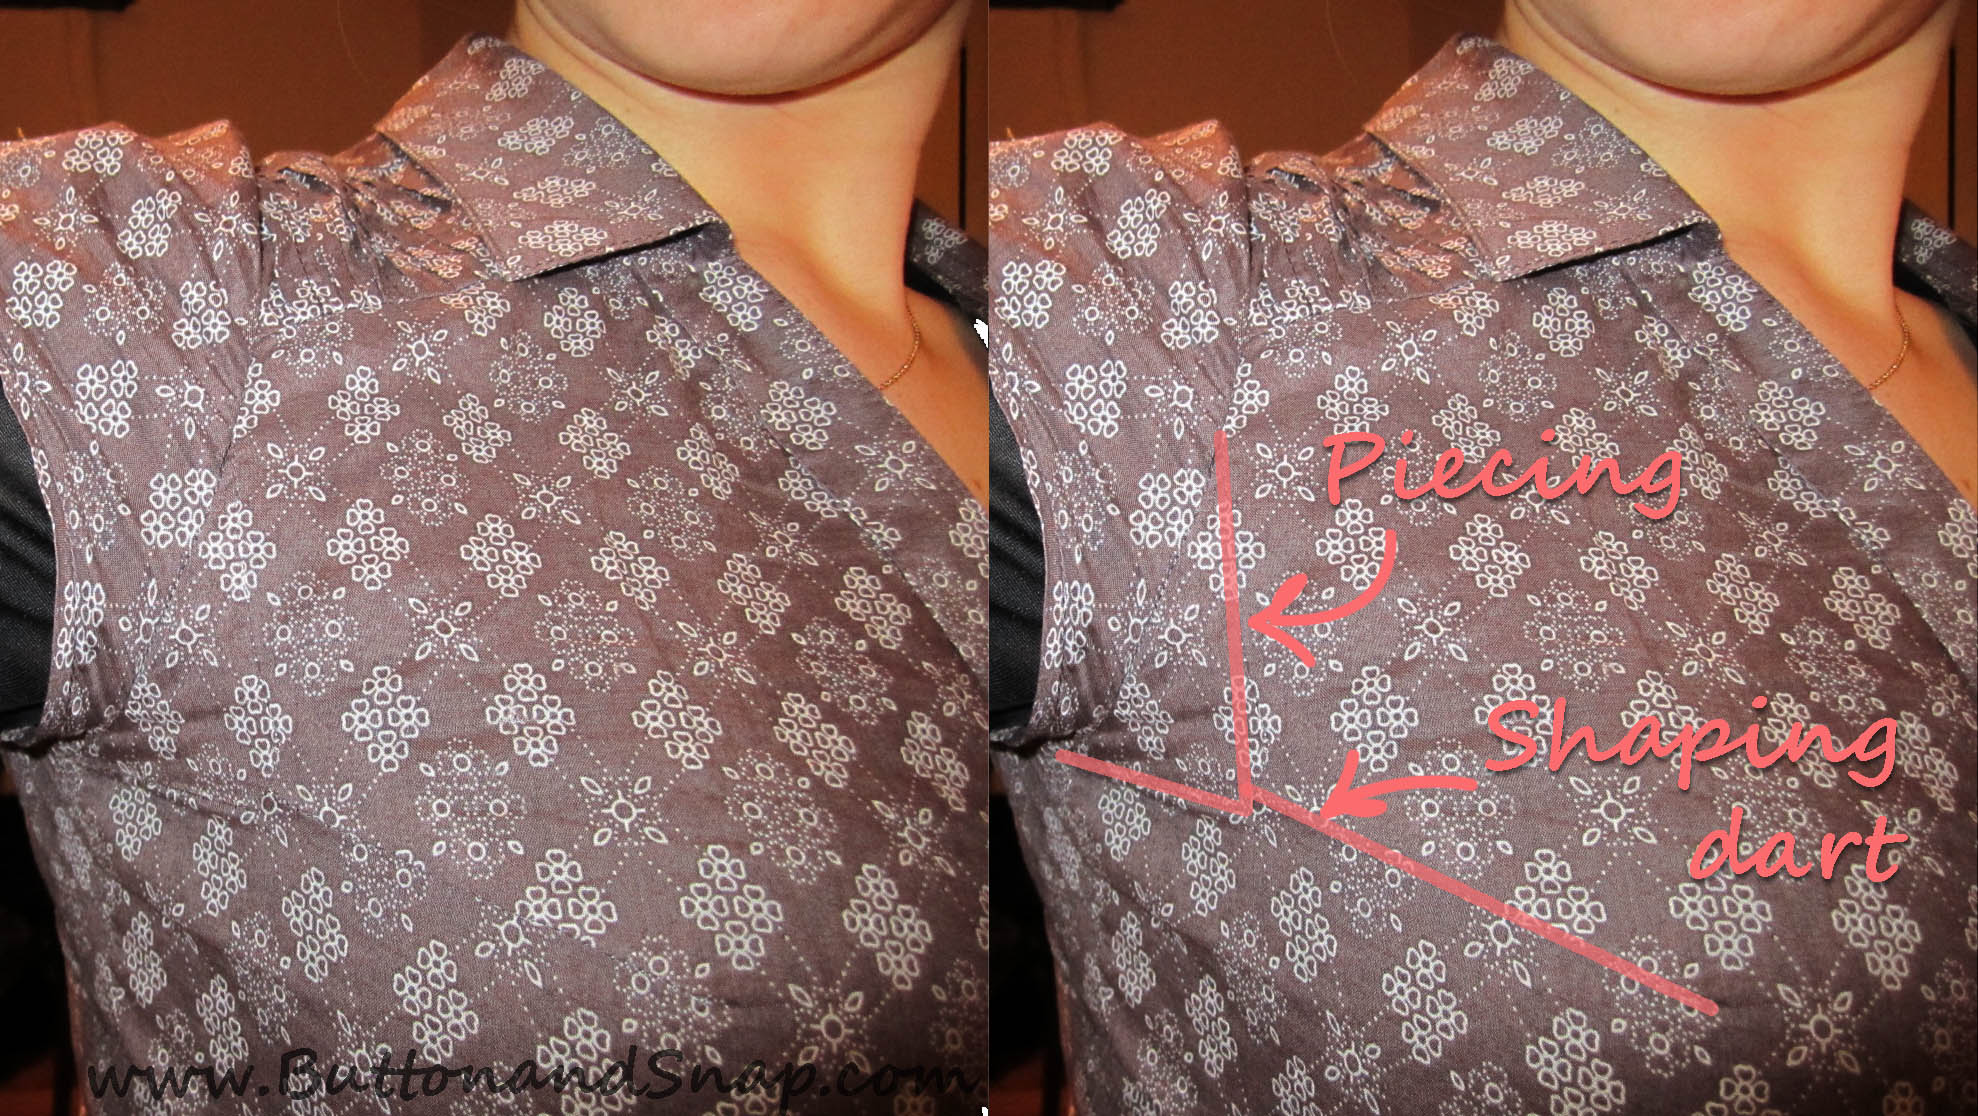
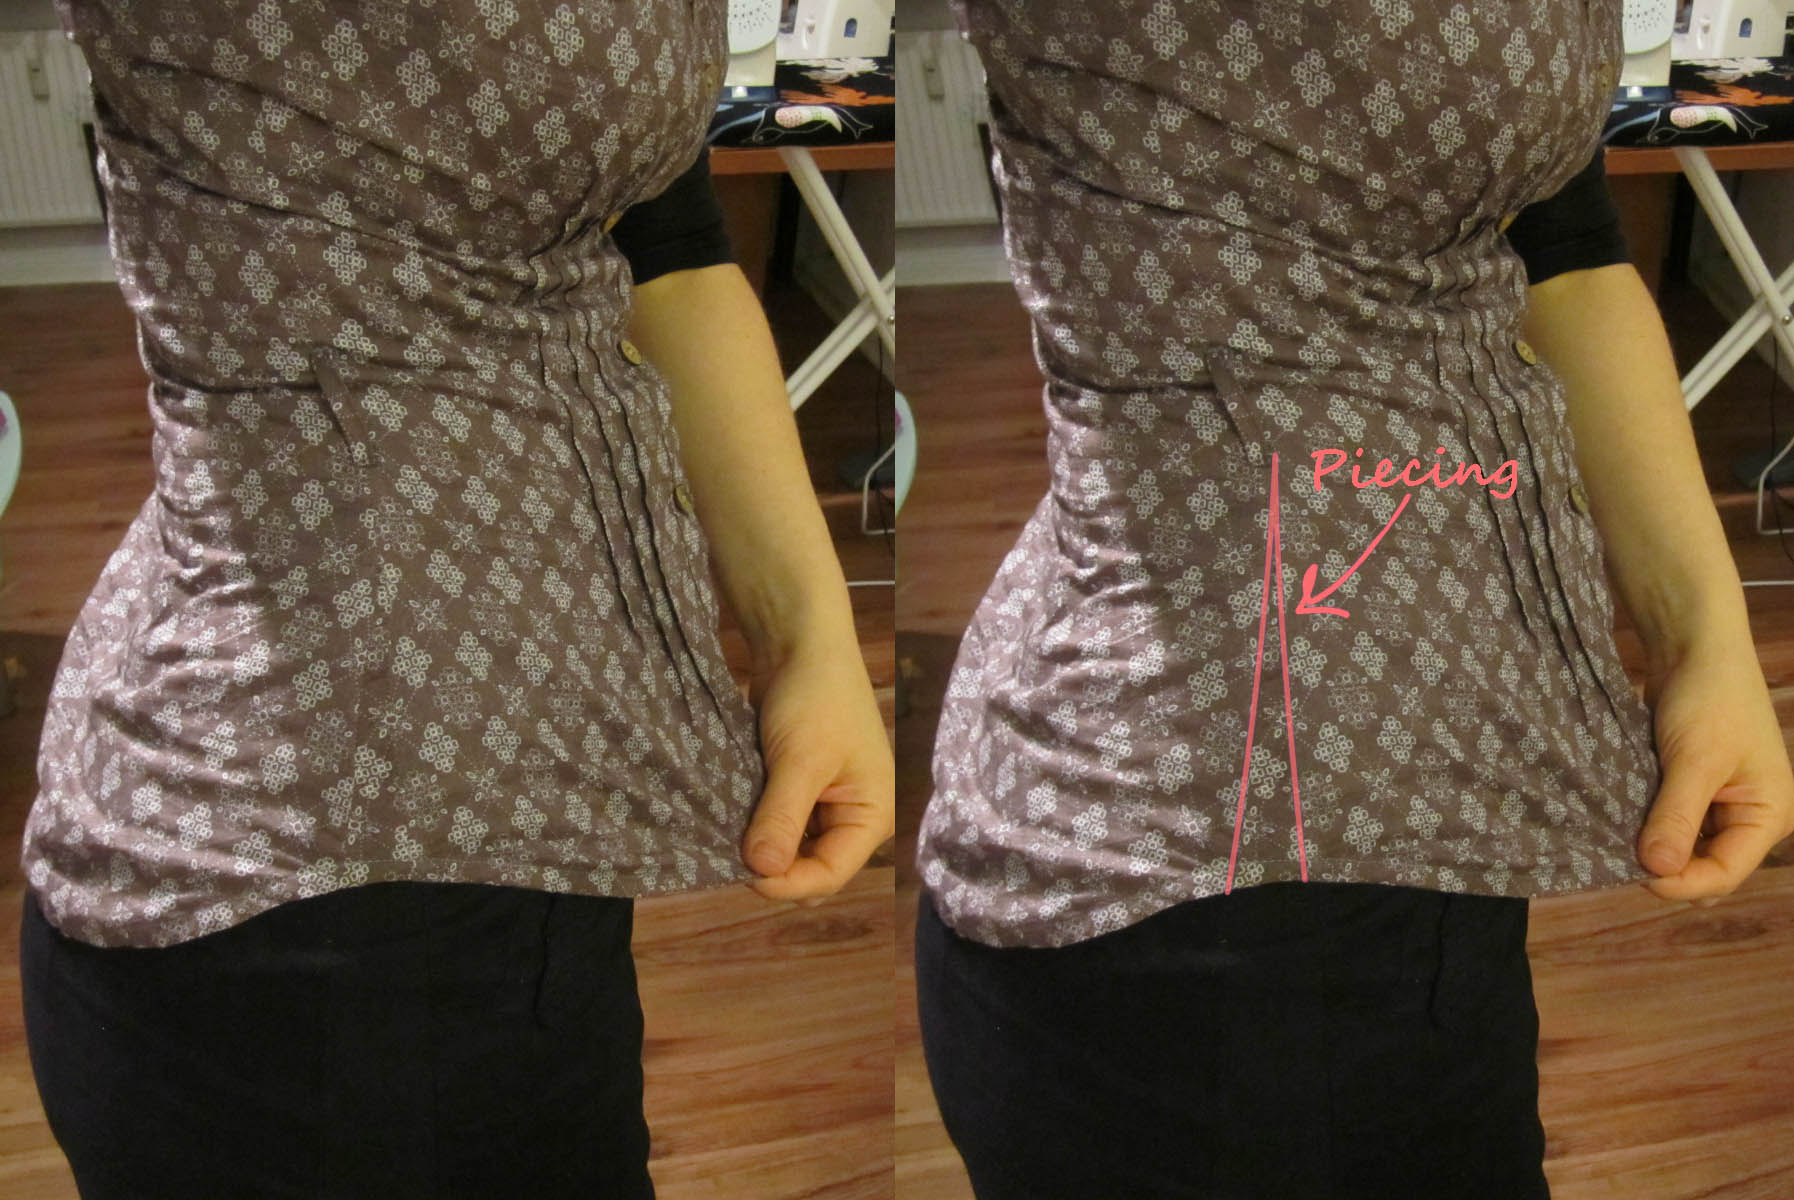
Also, once I added the bust dart, I realized that the edges of the armhole at the bustline didn’t come close enough to my arms anymore. That’s hard to explain clearly, but here’s a picture of the piecing I added to fill the gap. The angled edge of the piecing follows the shape of the armhole before I added that piece. It’s angled, and it dips waaay to far forward:
I was having so much fun matching prints and adding extra pieces to the blouse that I decided to add a bit of fabric to the sids seams at the hips since it was a little tight. I kind of overdid it on adding to the hips, but the end effect was kind of peplum-y, which is stylish, so I’m content. This print really camouflages the piecing well as long as it’s matched. Amazing.
Altering the skirt to make it larger
You know how it goes with sewing: you can always make something smaller, but seldom larger. And making something 5 inches larger? Ha!
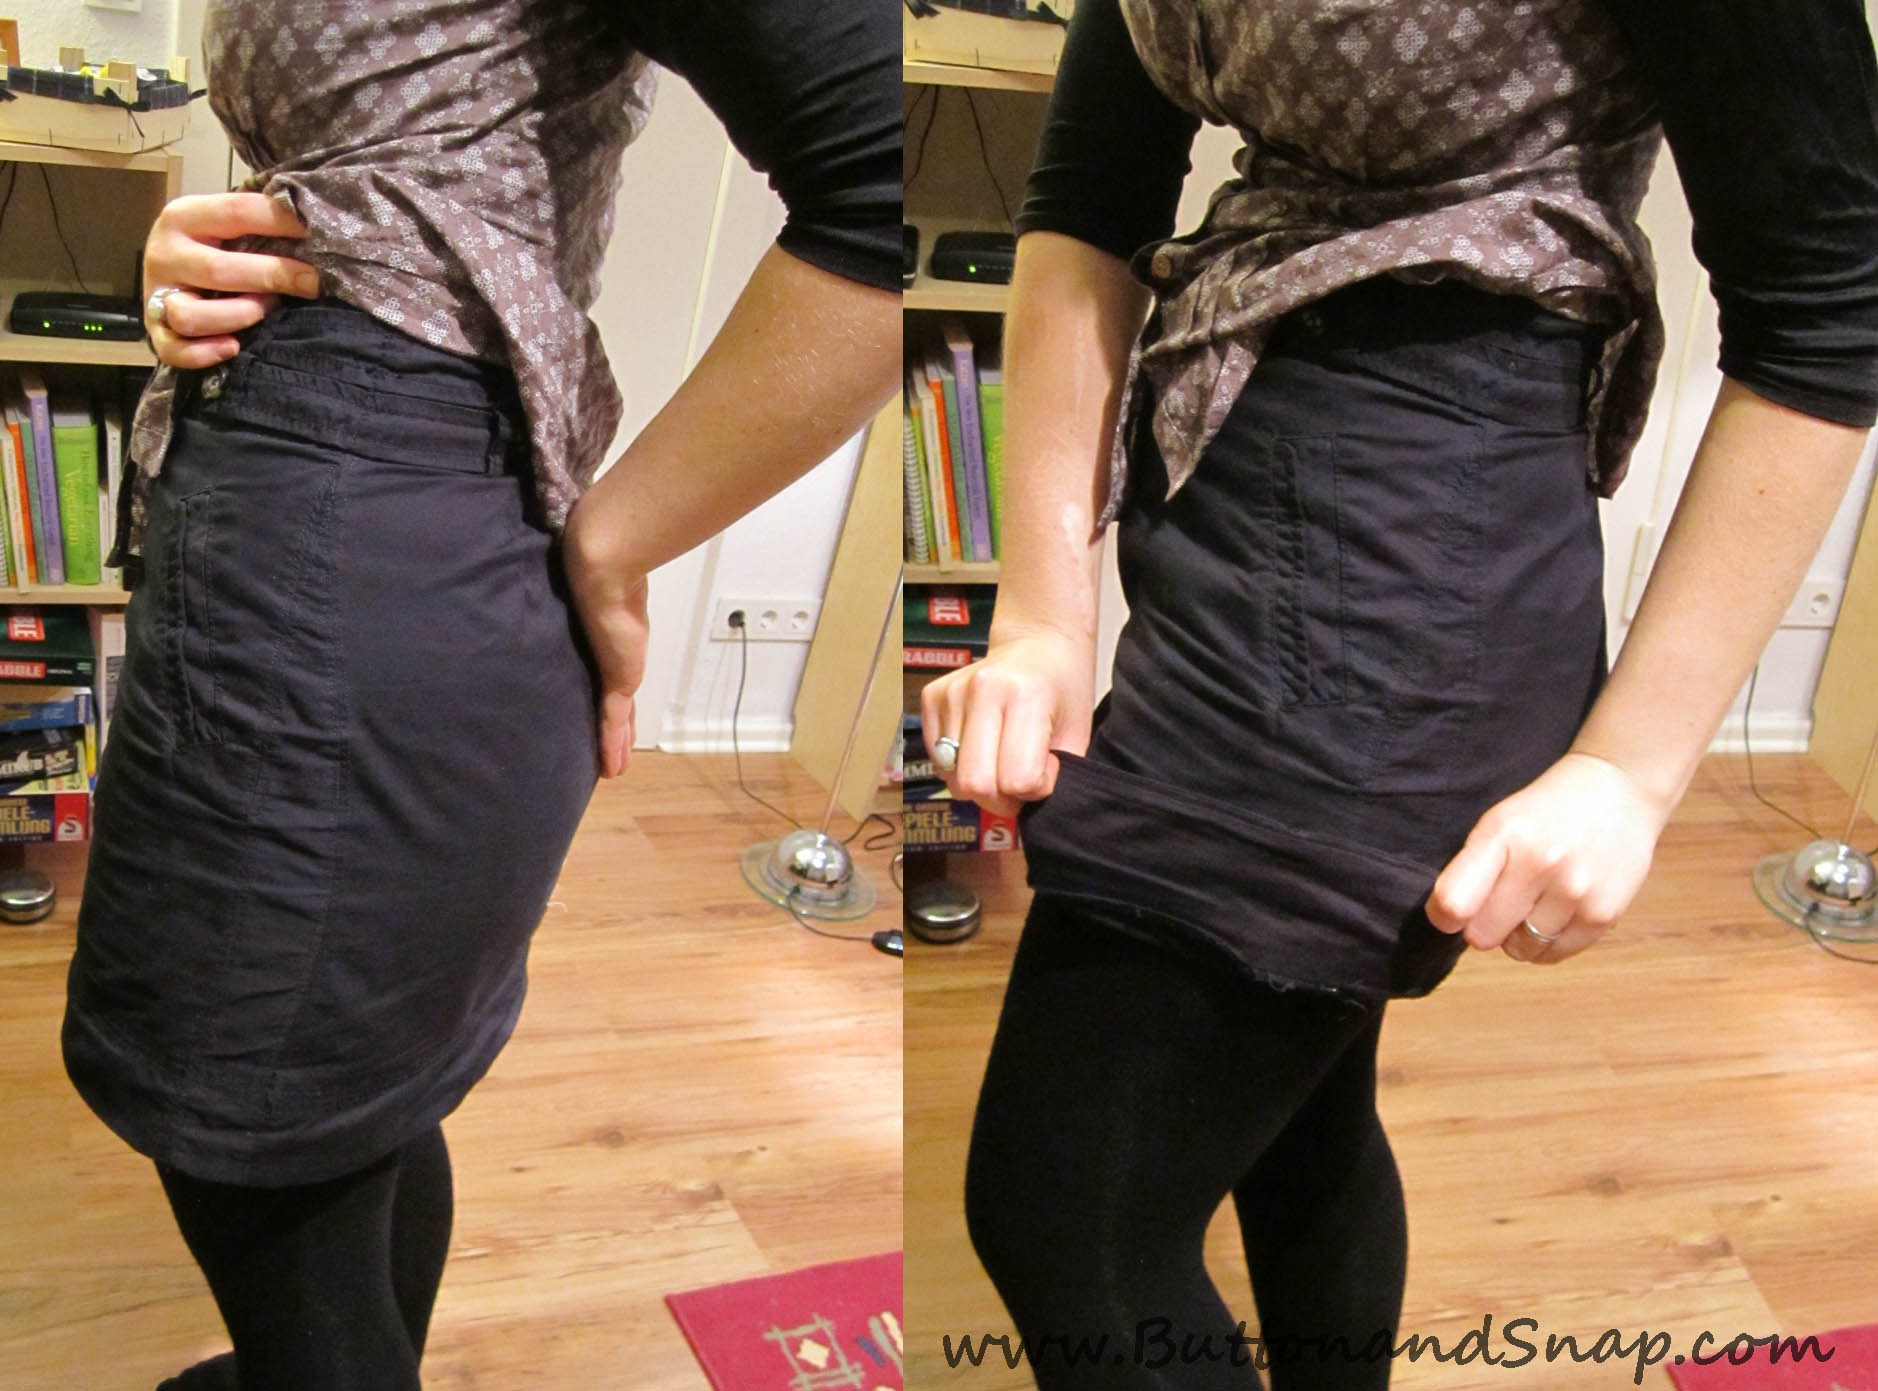
Well, this skirt was so cute (and cheap) that I decided to figure out a way to do just that. I didn’t come up with anything better than adding a strip to the side seams- sort of an obvious and ugly fix – but I think that it’s camouflaged by the fact that the skirt is black and that usually no one’s focused on my side seams.In any case, no one has stopped me on the street to comment on my alteration.
In order to make the panels blend in as well as possible, I cut off and used a 3-inch wide strip of fabric on the inside of the skirt at the hem, then replaced that with some black cotton I had (pictured on the right below). The side panels have a slightly different sheen, since their fabric’s nap is sideways to the rest of the fabric. Although it really shows up in the left photo, you can see in the right phot that it’s actually not that obvious.
I also topstitched the pocktes in front closed because they gapped. I usually have this problem with diagonally placed pockets on garments, so I usally close the pockets, though it’s annoying to never have functioning pockets.
Have you tried making something larger? Do you have problems with gaping pockets or another solution to the problem? Let me know in the comments!


Leave a Reply